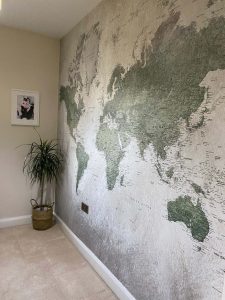
Removing a wall mural can be a tricky process, and if not done properly, it can lead to significant damage to the underlying drywall. Improper mural removal techniques can result in torn drywall paper, dents, gouges, and adhesive residue left on the wall surface. However, with the right tools, materials, and techniques, you can repair this damage and restore your wall to its original condition.
Assessing the Extent of Wall Damage
Before beginning the repair process, it’s essential to thoroughly inspect the wall and assess the extent of the damage caused by the mural removal. Look for areas where the drywall paper has been torn or peeled away, as well as any dents, dings, or gouges in the drywall itself. Additionally, check for any remaining adhesive residue on the wall surface. Determining the severity of the damage will help you choose the best repair approach.
Tools and Materials Needed
To effectively repair wall damage caused by improper mural removal, you’ll need the following tools and materials:
- Drop cloths
- Sponges and/or cloths
- Cleaning solution (e.g., wallpaper paste remover or vinegar and water mixture)
- Utility knife or scraper
- Drywall joint compound
- Putty knife
- Sandpaper (various grit sizes)
- Taping knife
- Painter’s tape
- Whisk broom
- Paint supplies (buckets, pans, liners, brushes, rollers, etc.)
- Sealing primer (shellac or oil-based)
- Personal protective equipment (face masks, eyewear, gloves, etc.)
Repairing Torn or Peeling Drywall Paper
One of the most common types of damage caused by improper mural removal is torn or peeling drywall paper. To repair this issue, follow these steps:
- Clean the damaged area, removing any loose debris or wallpaper residue.
- Apply an oil-based primer (like Kilz) over the torn drywall paper. Allow it to dry completely.
- Apply one or two coats of drywall joint compound over the primed area, feathering the edges to create a smooth transition with the surrounding wall.
- Once the joint compound is dry, sand the area smooth using fine-grit sandpaper.
- Prime and paint the repaired area to match the rest of the wall.
Fixing Dents, Dings, and Gouges
In addition to torn paper, improper mural removal can also cause dents, dings, and gouges in the drywall. To repair these issues:
- Clean the damaged area, removing any loose debris.
- Using a putty knife, fill the dent or gouge with spackling paste or drywall joint compound.
- Allow the filler to dry completely, then sand the area smooth with fine-grit sandpaper.
- Prime and paint the repaired area to bl click here for more info end with the surrounding wall.
Removing Adhesive Residue
Adhesive residue left behind after mural removal can prevent proper paint adhesion and result in an uneven appearance. To remove this residue:
-
- Apply a suitable cleaning solution (wallpaper paste remover or a mixture of vinegar and water) to the residue.
- Scrub the area with a sponge or cloth to loosen and remove the adhesive.
- Rinse the wall with clean water and allow it to dry completely.
- If necessary, sand the area lightly to ensure a smooth surface for painting.
Priming and Painting the Repaired Wall
After completing all repairs, it’s crucial to prime and paint the wall to achieve a seamless, uniform appearance.
- Apply a sealing primer (shellac or oil-based) over the entire repaired area. This will help the new paint adhere properly and prevent any remaining imperfections from showing through.
- Once the primer is dry, paint the wall with a color that matches the surrounding area. Use a roller for large areas and a brush for edges and smaller sections.
- Apply a second coat of paint, if needed, to ensure even coverage and a professional-looking finish.
Tips for Avoiding Wall Damage During Mural Removal
To minimize the risk of wall damage when removing a mural in the future, consider the following tips:
- Use a hairdryer or heat gun to soften the adhesive before attempting to remove the mural.
- Start at a corner and work slowly, carefully peeling the mural away from the wall at a 45-degree angle.
- If the mural is resistant to removal, consider using a steamer to further soften the adhesive.
- Avoid using excessive force or sharp tools that may damage the drywall beneath the mural.
When to Call a Professional
While many wall repairs can be tackled by DIY enthusiasts, there are some instances where it’s best to call in a professional:

- If the damage is extensive and requires significant drywall replacement
- If you’re unsure of your ability to achieve a seamless, professional-looking repair
- If the damaged area is large or in a prominent location where a flawless finish is crucial
By following these steps and tips, you can successfully repair wall damage caused by improper mural removal and restore your space to its former glory.
| Type of Damage | Repair Steps |
|---|---|
| Torn or Peeling Drywall Paper | 1. Clean the area 2. Apply oil-based primer 3. Apply drywall joint compound 4. Sand smooth 5. Prime and paint |
| Dents, Dings, and Gouges | 1. Clean the area 2. Fill with spackling paste or joint compound 3. Allow to dry and sand smooth 4. Prime and paint |
| Adhesive Residue | 1. Apply cleaning solution 2. Scrub to remove residue 3. Rinse with clean water 4. Allow to dry and sand if needed |

Hi there! My name is Ashton Pulsford and I’m an interior designer. I love making spaces look beautiful and feel cozy.
I started EasyWalls to share tips and ideas for decorating your home with wallpaper. Wallpaper is a fun way to add color and patterns to your walls. But it can be tricky to put up and take down. That’s where I come in!


